> ## Documentation Index
> Fetch the complete documentation index at: https://dripart-docs-wan3-30off-promo.mintlify.site/llms.txt
> Use this file to discover all available pages before exploring further.
# 字节跳动 USO ComfyUI 原生工作流示例
> 使用字节跳动 USO 模型实现统一风格和主体驱动生成
**USO (Unified Style-Subject Optimized)** 是字节跳动 UXO 团队开发的模型,统一了风格驱动和主体驱动生成任务。
基于 FLUX.1-dev 架构构建,该模型通过解耦学习和风格奖励学习 (SRL) 实现了风格相似性和主体一致性。
USO 支持三种主要方法:
* **主体驱动**:将主体放置到新场景中,同时保持身份一致性
* **风格驱动**:基于参考图像将艺术风格应用于新内容
* **组合模式**:同时使用主体和风格参考
**相关链接**
* [项目主页](https://bytedance.github.io/USO/)
* [GitHub](https://github.com/bytedance/USO)
* [模型权重](https://huggingface.co/bytedance-research/USO)
## 字节跳动 USO ComfyUI 原生工作流
请确保你的 ComfyUI 已经更新。
* [ComfyUI 下载](https://www.comfy.org/download)
* [ComfyUI 更新教程](/zh/installation/update_comfyui)
本指南里的工作流可以在[工作流模板](/zh/interface/features/template)中找到。如果找不到,可能是 ComfyUI 没有更新。
如果加载工作流时有节点缺失,可能原因有:
1. 你用的不是最新版(每夜版)。
2. 启动时有些节点导入失败。
* [Cloud](https://cloud.comfy.org) 会在 ComfyUI 稳定版本发布后更新。
所以,如果你发现本文档中有任何核心节点缺失,可能是因为新核心节点尚未在最新稳定版中发布。请等待下一个稳定版发布。
Flux.1 Dev USO 参考图像生成
使用参考图像同时控制风格和主体。在改变艺术风格时保持角色面部,或将艺术风格应用于新场景。
 在 Comfy Cloud 上运行此工作流
下载工作流 JSON 并将其拖入 ComfyUI
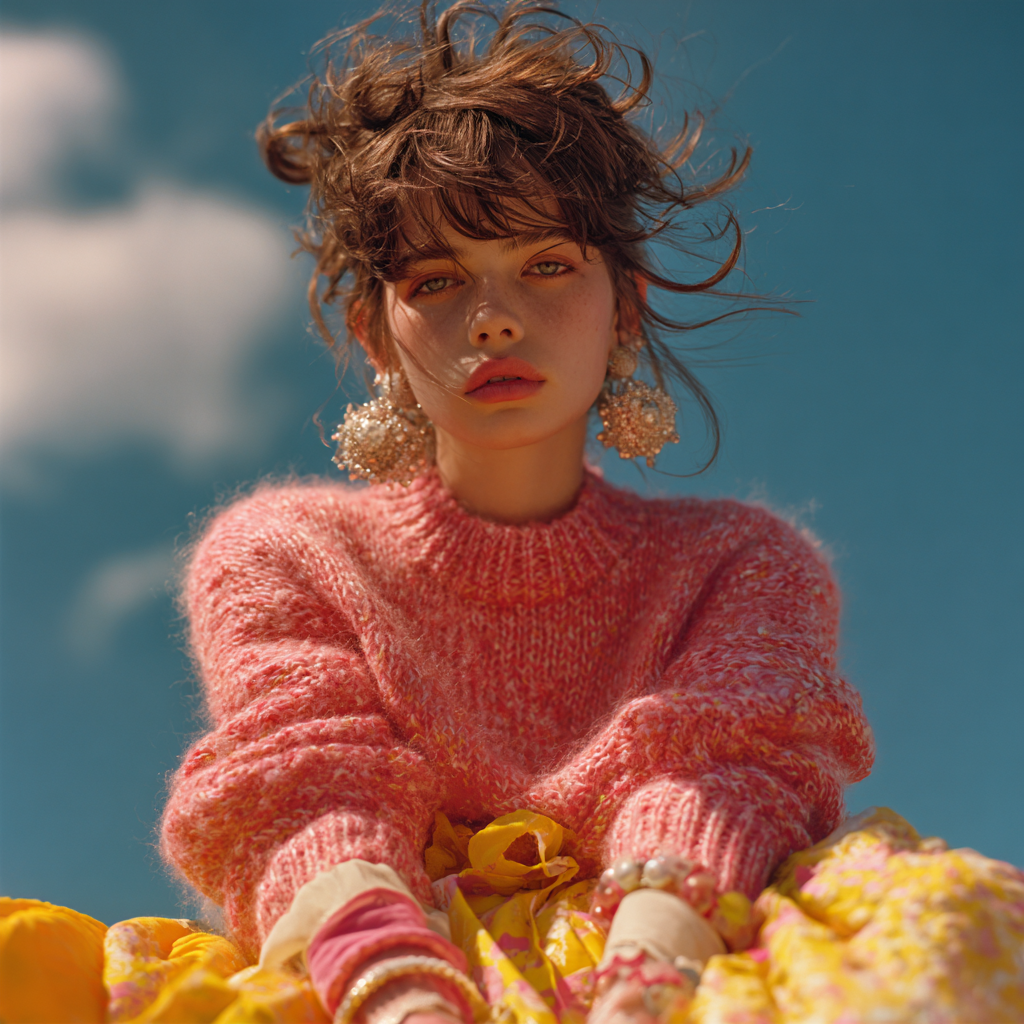
**输入素材**
将文件上传到对应的 `LoadImage` 节点:
`LoadImage` 节点 47 · `flux1_dev_uso_reference_image_gen_input_image.png`
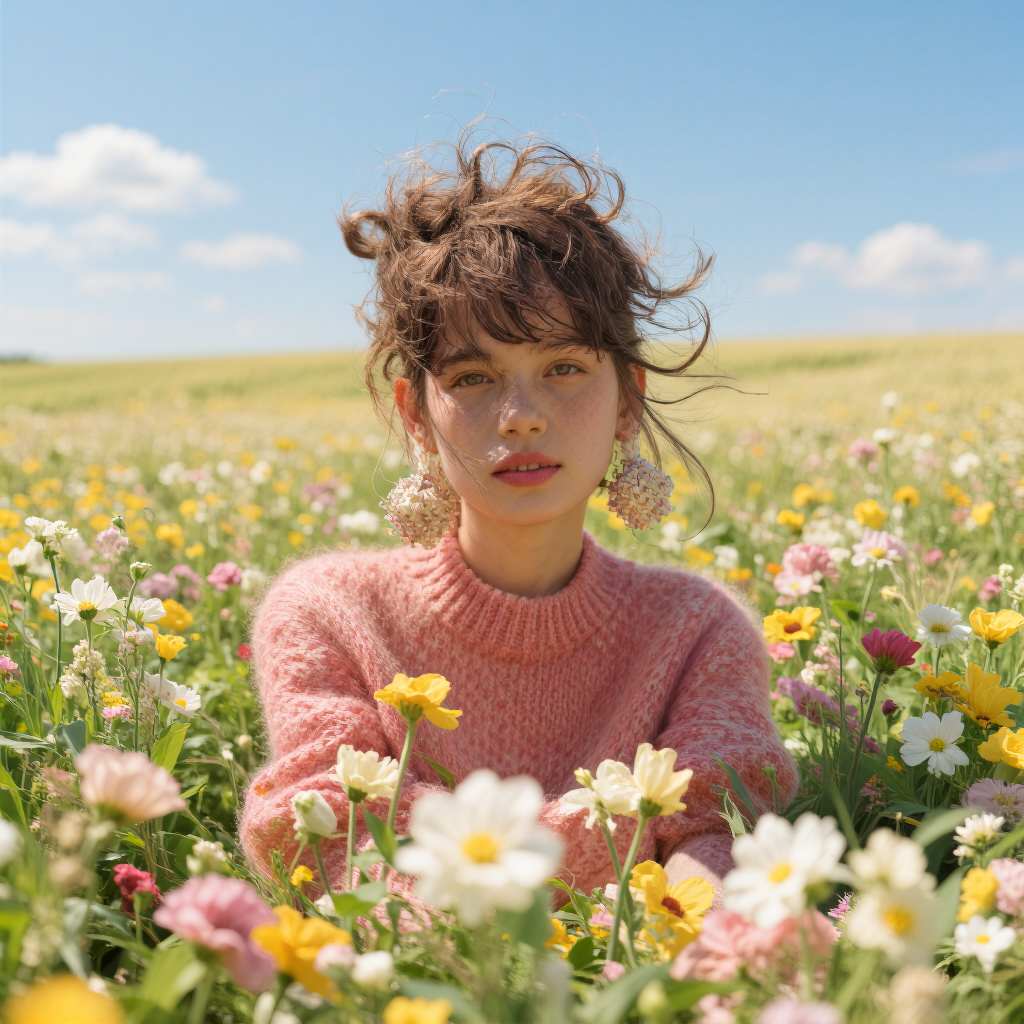
**输出示例**
### 1. 工作流和输入
### 2. 模型链接
**模型**
* [flux1-dev-fp8.safetensors](https://huggingface.co/Comfy-Org/flux1-dev/blob/main/flux1-dev-fp8.safetensors)
**loras**
* [uso-flux1-dit-lora-v1.safetensors](https://huggingface.co/Comfy-Org/USO_1.0_Repackaged/blob/main/split_files/loras/uso-flux1-dit-lora-v1.safetensors)
**模型补丁**
* [uso-flux1-projector-v1.safetensors](https://huggingface.co/Comfy-Org/USO_1.0_Repackaged/blob/main/split_files/model_patches/uso-flux1-projector-v1.safetensors)
**clip\_visions**
* [sigclip\_vision\_patch14\_384.safetensors](https://huggingface.co/Comfy-Org/sigclip_vision_384/blob/main/sigclip_vision_patch14_384.safetensors)
请全部下载模型并将它们放置在以下目录中:
```
📂 ComfyUI/
├── 📂 models/
│ ├── 📂 checkpoints/
│ │ └── flux1-dev-fp8.safetensors
│ ├── 📂 loras/
│ │ └── uso-flux1-dit-lora-v1.safetensors
│ ├── 📂 model_patches/
│ │ └── uso-flux1-projector-v1.safetensors
│ ├── 📂 clip_visions/
│ │ └── sigclip_vision_patch14_384.safetensors
```
### 3. 工作流说明
在 Comfy Cloud 上运行此工作流
下载工作流 JSON 并将其拖入 ComfyUI
**输入素材**
将文件上传到对应的 `LoadImage` 节点:
`LoadImage` 节点 47 · `flux1_dev_uso_reference_image_gen_input_image.png`
**输出示例**
### 1. 工作流和输入
### 2. 模型链接
**模型**
* [flux1-dev-fp8.safetensors](https://huggingface.co/Comfy-Org/flux1-dev/blob/main/flux1-dev-fp8.safetensors)
**loras**
* [uso-flux1-dit-lora-v1.safetensors](https://huggingface.co/Comfy-Org/USO_1.0_Repackaged/blob/main/split_files/loras/uso-flux1-dit-lora-v1.safetensors)
**模型补丁**
* [uso-flux1-projector-v1.safetensors](https://huggingface.co/Comfy-Org/USO_1.0_Repackaged/blob/main/split_files/model_patches/uso-flux1-projector-v1.safetensors)
**clip\_visions**
* [sigclip\_vision\_patch14\_384.safetensors](https://huggingface.co/Comfy-Org/sigclip_vision_384/blob/main/sigclip_vision_patch14_384.safetensors)
请全部下载模型并将它们放置在以下目录中:
```
📂 ComfyUI/
├── 📂 models/
│ ├── 📂 checkpoints/
│ │ └── flux1-dev-fp8.safetensors
│ ├── 📂 loras/
│ │ └── uso-flux1-dit-lora-v1.safetensors
│ ├── 📂 model_patches/
│ │ └── uso-flux1-projector-v1.safetensors
│ ├── 📂 clip_visions/
│ │ └── sigclip_vision_patch14_384.safetensors
```
### 3. 工作流说明
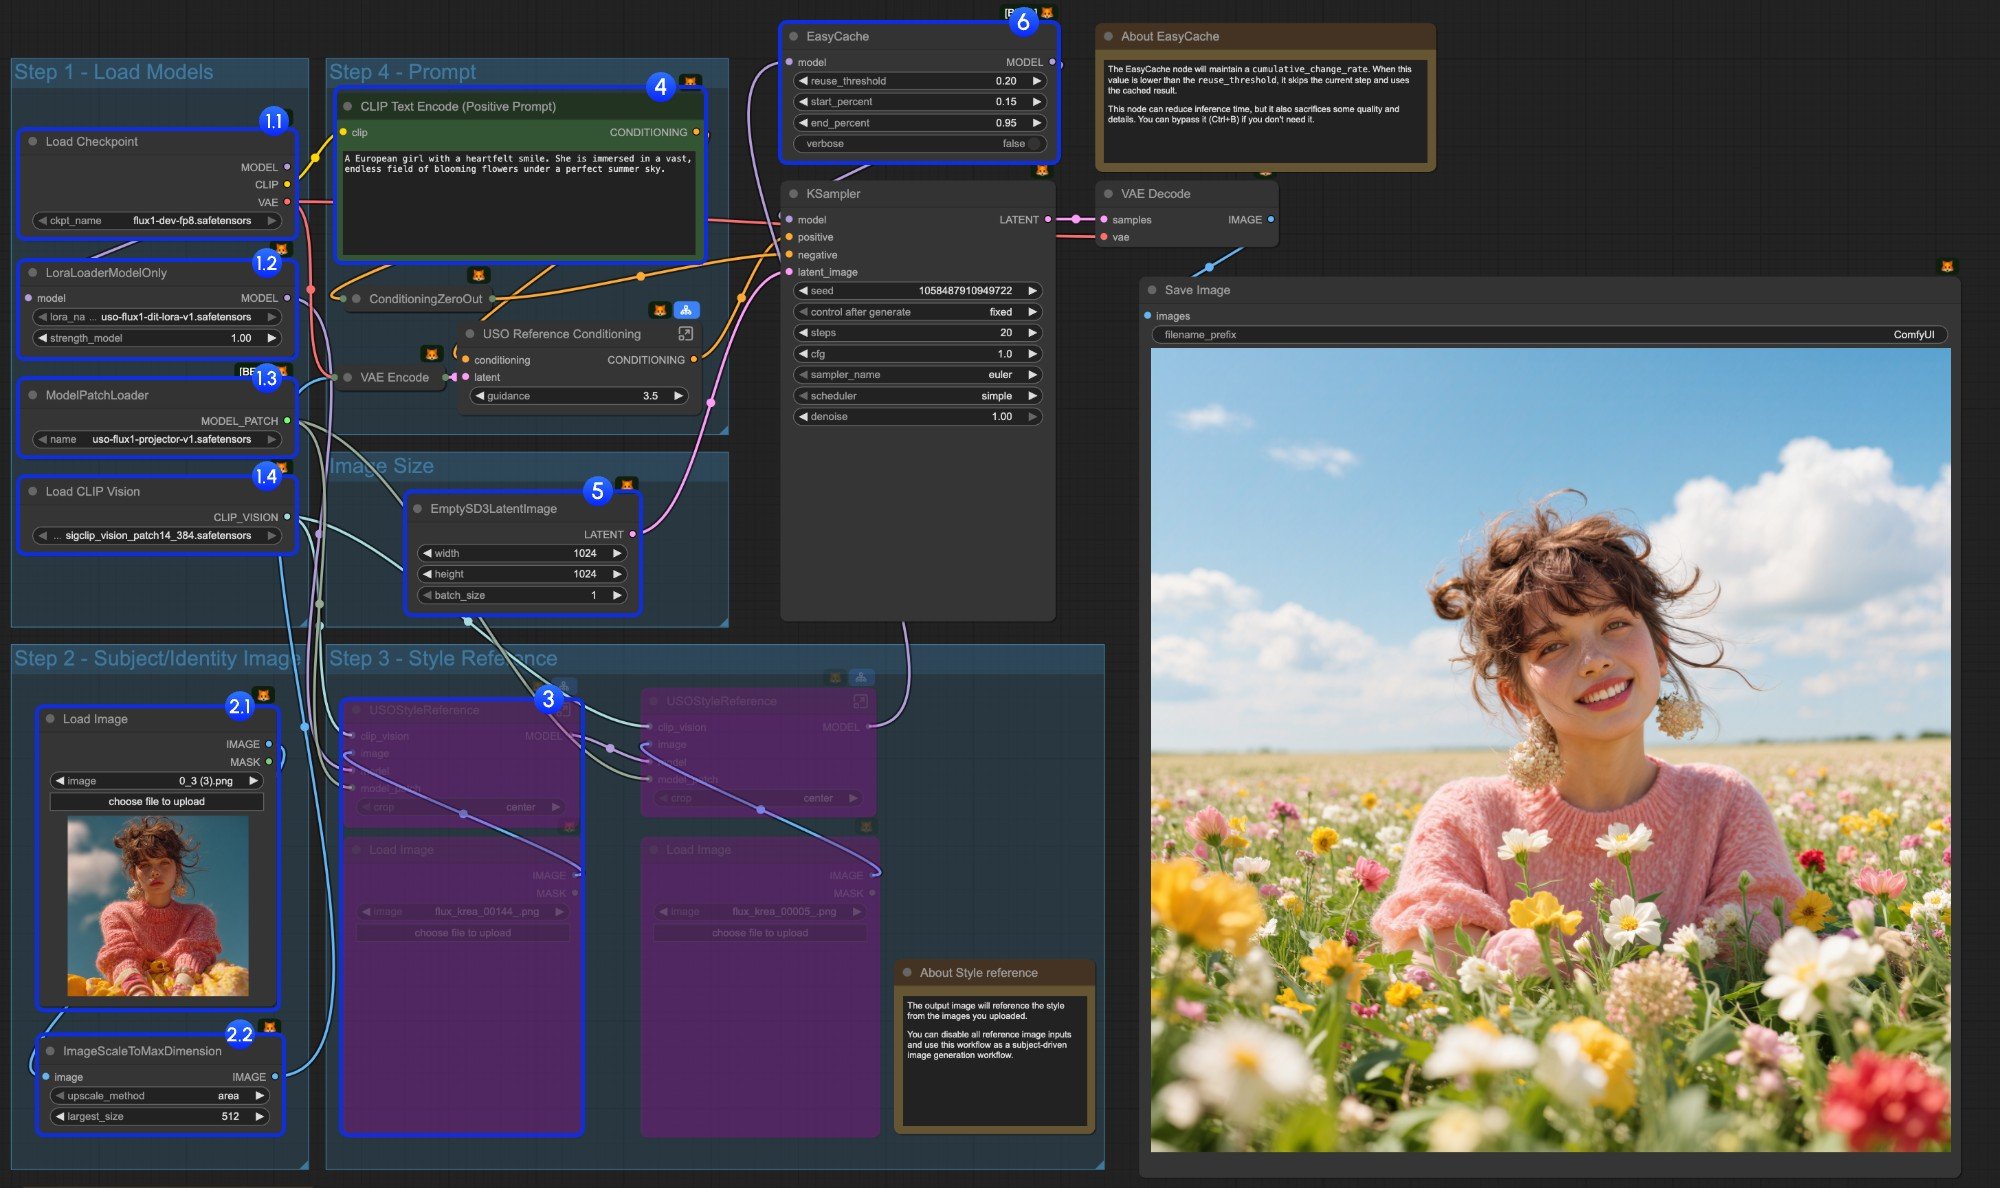 1. 加载模型:
* 1.1 确保 `Load Checkpoint` 节点已加载 `flux1-dev-fp8.safetensors`
* 1.2 确保 `LoraLoaderModelOnly` 节点已加载 `dit_lora.safetensors`
* 1.3 确保 `ModelPatchLoader` 节点已加载 `projector.safetensors`
* 1.4 确保 `Load CLIP Vision` 节点已加载 `sigclip_vision_patch14_384.safetensors`
2. 内容参考:
* 2.1 点击 `Upload` 上传我们提供的输入图像
* 2.2 `ImageScaleToMaxDimension` 节点将缩放你的输入图像用于内容参考。512px 会保留更多角色特征,但若仅使用角色头部作为输入,最终输出图像往往会出现角色占据太多空间的问题。设置为 1024px 会得到更好的结果。
3. 在示例中,我们只使用 `content reference` 图像输入。如果你想使用 `style reference` 图像输入,可以使用 `Ctrl-B` 绕过标记的节点组。
4. 编写你的提示词或保持默认设置
5. 如果需要,设置图像尺寸
6. EasyCache 节点用于推理加速,但也会牺牲一些质量和细节。如果不需要使用,可以用 Ctrl+B 绕过它。
7. 点击 `Run` 按钮,或使用快捷键 `Ctrl(Cmd) + Enter` 运行工作流
### 4. 补充说明
1. 仅使用风格参考:
我们在同一个工作流中也提供了仅使用风格参考的版本
1. 加载模型:
* 1.1 确保 `Load Checkpoint` 节点已加载 `flux1-dev-fp8.safetensors`
* 1.2 确保 `LoraLoaderModelOnly` 节点已加载 `dit_lora.safetensors`
* 1.3 确保 `ModelPatchLoader` 节点已加载 `projector.safetensors`
* 1.4 确保 `Load CLIP Vision` 节点已加载 `sigclip_vision_patch14_384.safetensors`
2. 内容参考:
* 2.1 点击 `Upload` 上传我们提供的输入图像
* 2.2 `ImageScaleToMaxDimension` 节点将缩放你的输入图像用于内容参考。512px 会保留更多角色特征,但若仅使用角色头部作为输入,最终输出图像往往会出现角色占据太多空间的问题。设置为 1024px 会得到更好的结果。
3. 在示例中,我们只使用 `content reference` 图像输入。如果你想使用 `style reference` 图像输入,可以使用 `Ctrl-B` 绕过标记的节点组。
4. 编写你的提示词或保持默认设置
5. 如果需要,设置图像尺寸
6. EasyCache 节点用于推理加速,但也会牺牲一些质量和细节。如果不需要使用,可以用 Ctrl+B 绕过它。
7. 点击 `Run` 按钮,或使用快捷键 `Ctrl(Cmd) + Enter` 运行工作流
### 4. 补充说明
1. 仅使用风格参考:
我们在同一个工作流中也提供了仅使用风格参考的版本
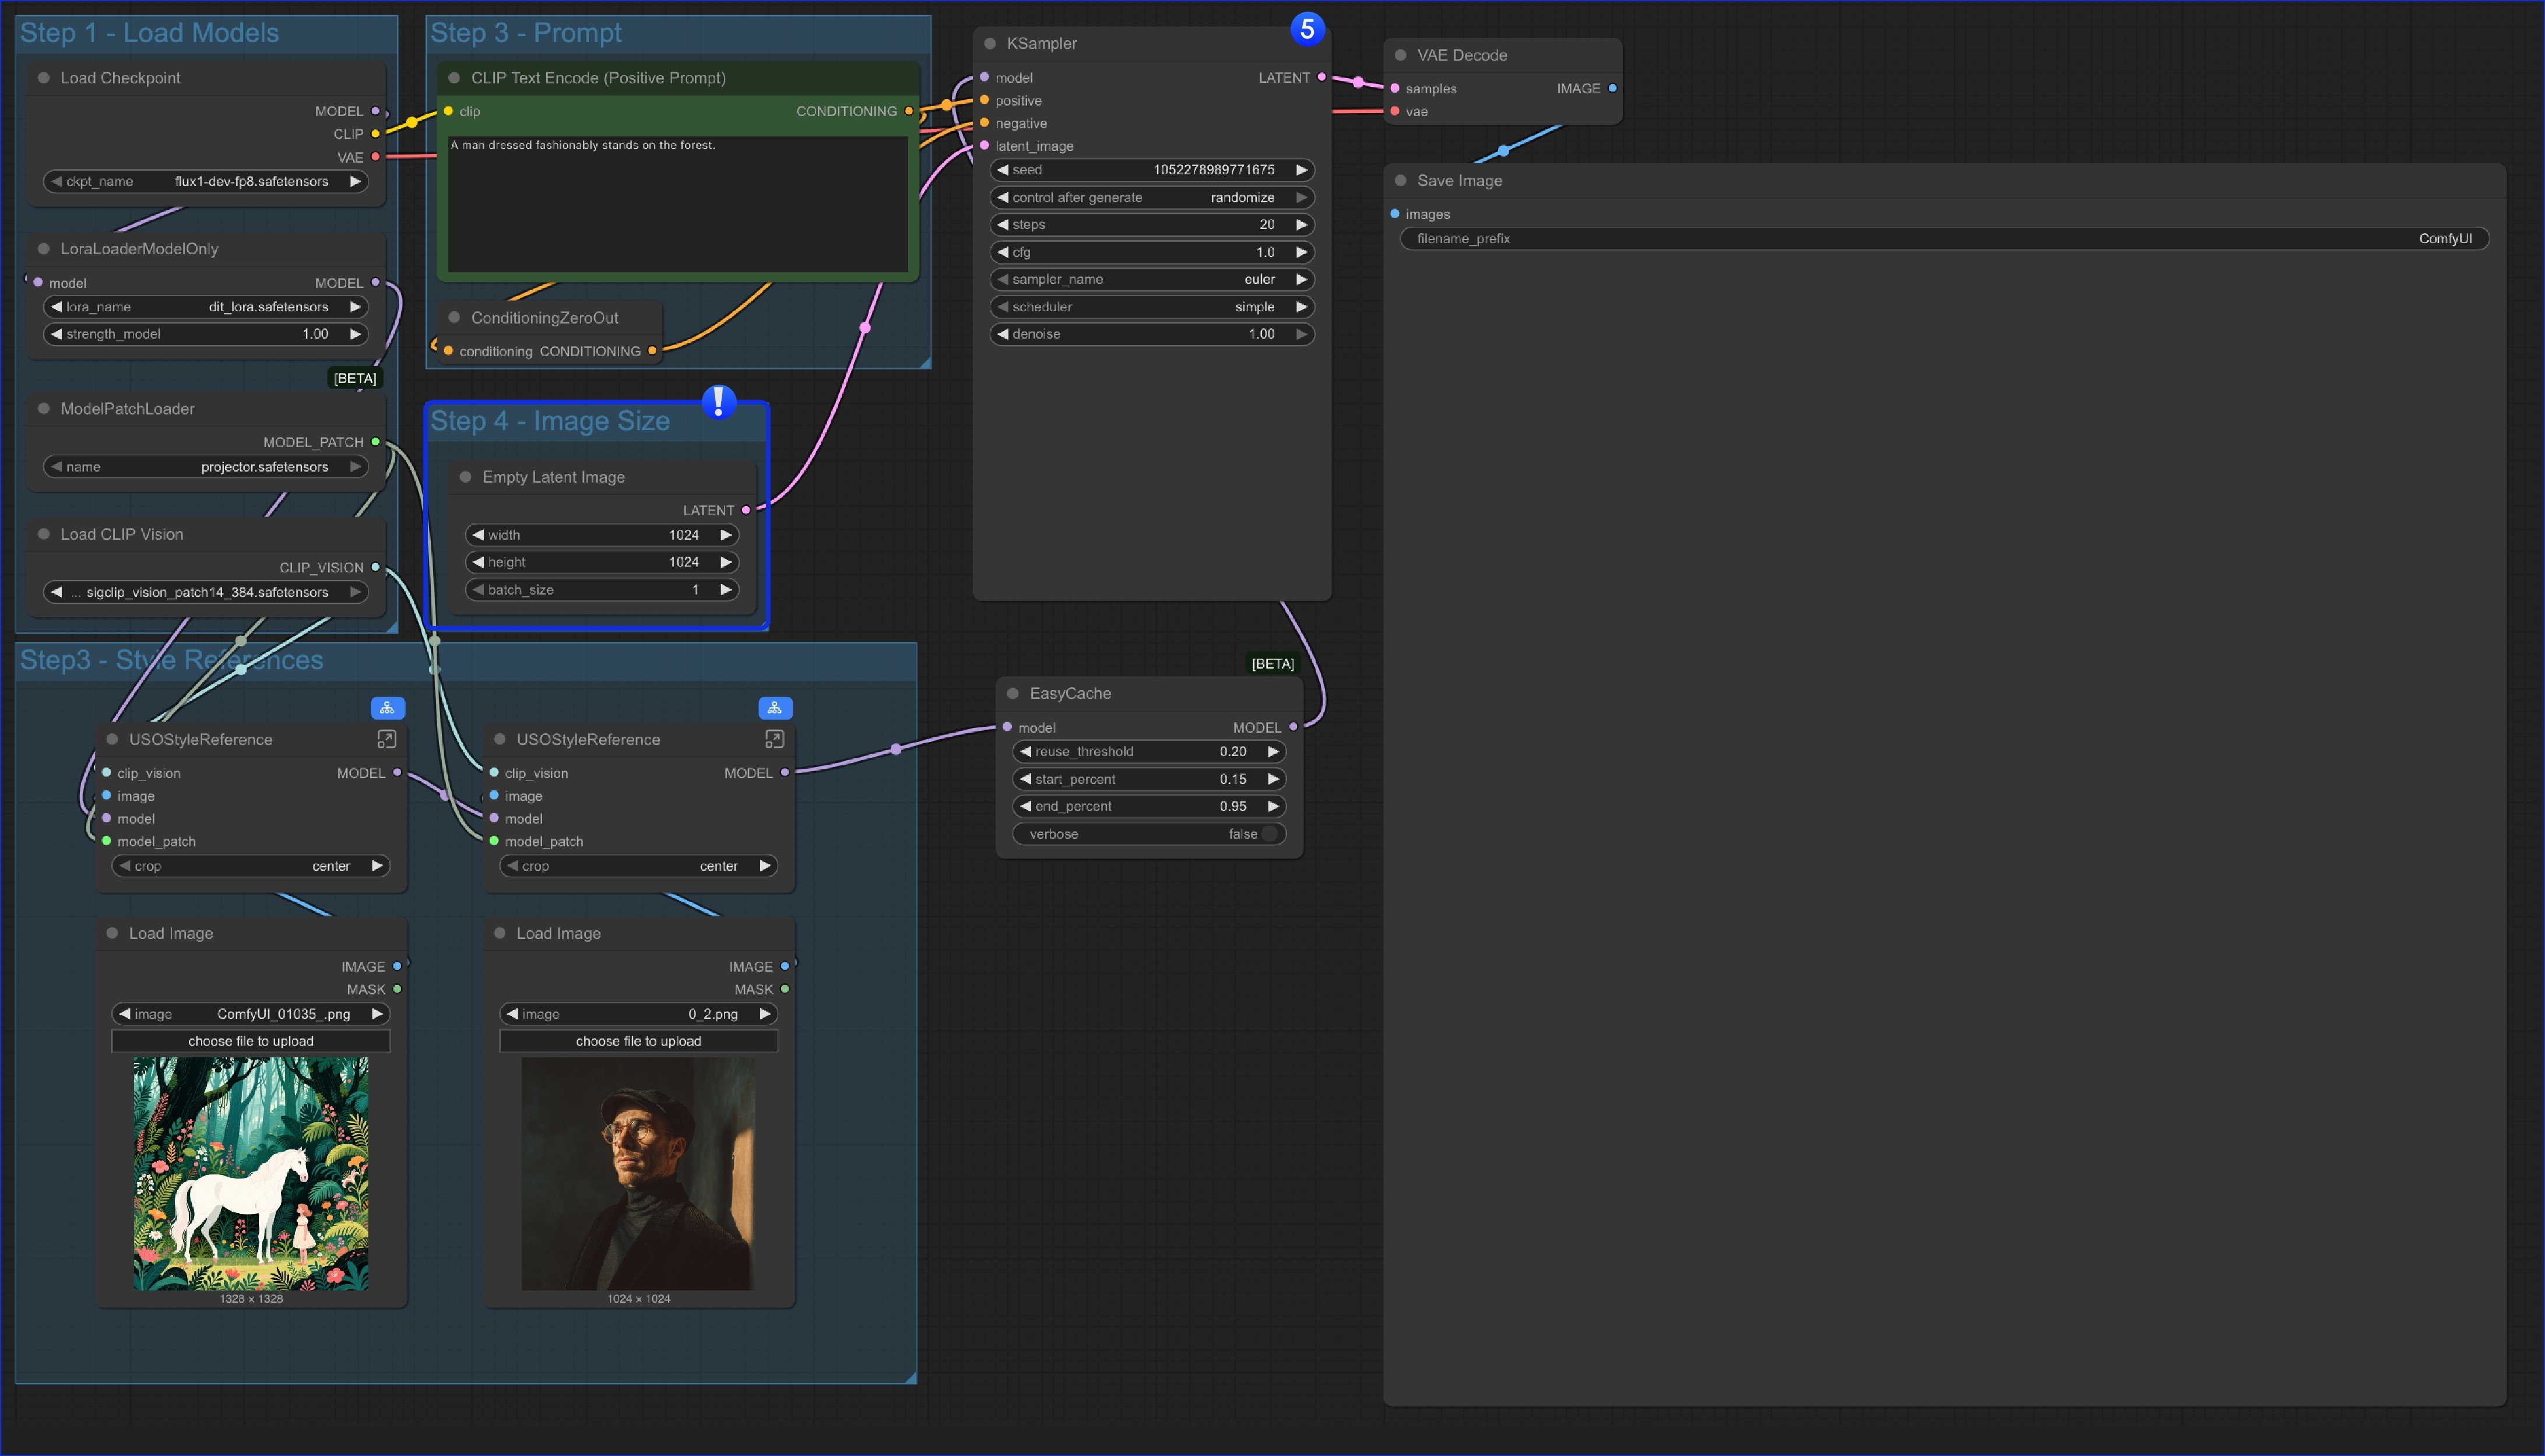 唯一的区别是我们替换了 `content reference` 节点,仅使用 `Empty Latent Image` 节点。
2. 你也可以绕过整个 `Style Reference` 组,将工作流用作文本转图像工作流,这意味着此工作流有 4 个变体:
* 仅使用内容(主体)参考
* 仅使用风格参考
* 混合内容及风格参考
* 作为文本转图像工作流
唯一的区别是我们替换了 `content reference` 节点,仅使用 `Empty Latent Image` 节点。
2. 你也可以绕过整个 `Style Reference` 组,将工作流用作文本转图像工作流,这意味着此工作流有 4 个变体:
* 仅使用内容(主体)参考
* 仅使用风格参考
* 混合内容及风格参考
* 作为文本转图像工作流